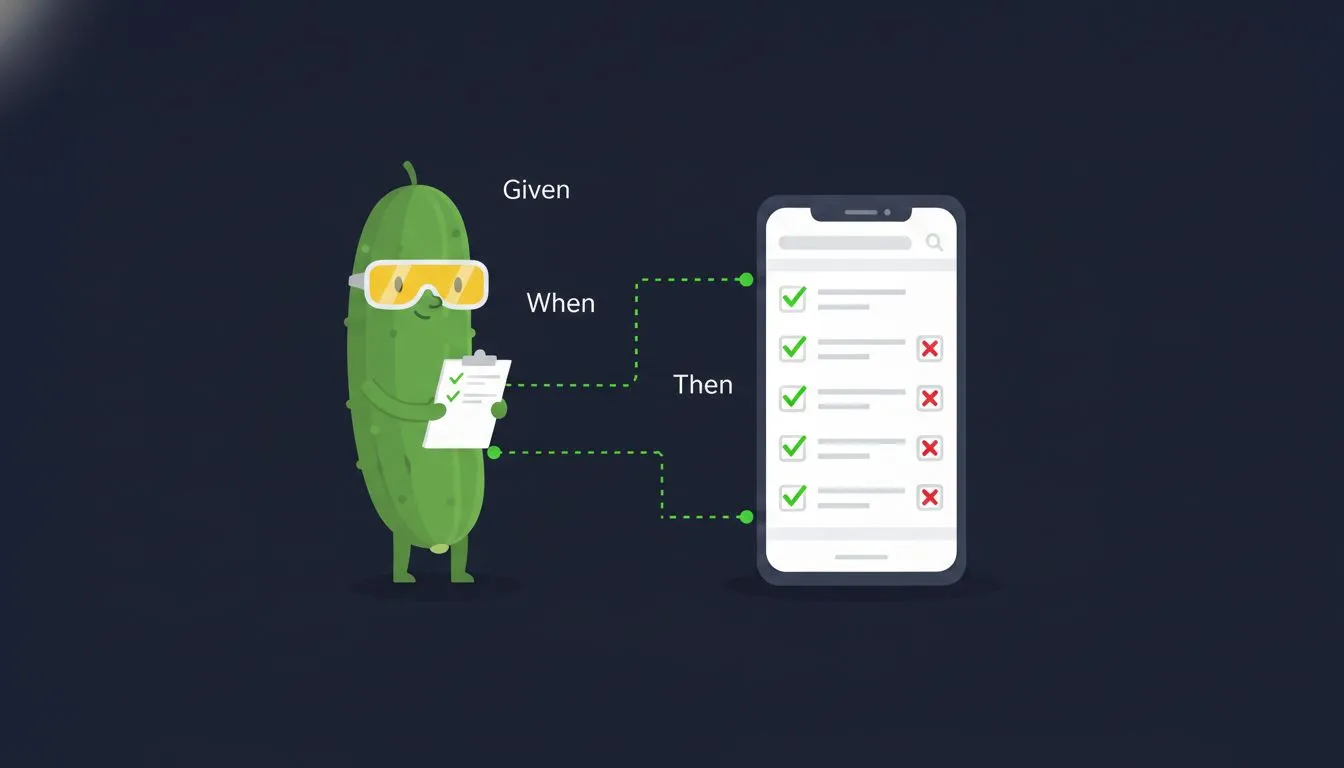
Pagdating sa dulo ng post na ito, may Detox ka nang tumatakbo sa iOS simulator at sa Android emulator, na may Cucumber feature files na nakasulat sa plain English sa ibabaw. Limang hakbang: i-install ang Detox, i-set up ang Cucumber, isulat ang support layer, sumulat ng feature, patakbuhin ito.
Saan bagay ang pairing na ito
Hindi default na React Native E2E stack ang Detox + Cucumber. Nananatiling imperative ang karamihan ng mga team gamit ang Jest bilang runner, o lumilipat sila sa WebdriverIO o Maestro kapag gusto nila ng flow-style tests. Makatuwiran ang mga pagpipiliang ‘yon. Maganda lalo na ang Maestro kung ang gusto mo lang ay mag-record ng isang flow.
Kaya bakit magdagdag ng BDD layer sa ibabaw ng Detox?
Dahil kapag mayroon nang feature files, kaya na itong basahin ng QA at ng mga PM. Makakapag-suggest sila ng scenarios na hindi mo maiisip na isulat. Pinananatili ng imperative Detox ang test design sa loob ng engineering. Inilalabas ito ng Cucumber.
Ang kapalit: dalawang dagdag na dependency at isang support layer, at sa karanasan ko, maliit lang ito kapag stable na ang step definitions. Limang minuto na lang ang bagong scenario.
Bakit BDD para sa E2E tests
Imperative test code ang ipinapakita ng karamihan ng Detox examples:
await element(by.id('email-input')).typeText('user@example.com');
await element(by.id('password-input')).typeText('password123');
await element(by.id('login-button')).tap();
await expect(element(by.id('home-screen'))).toBeVisible();
Gumagana ito. Parang code ang basa, hindi test specification. Kapag tinanong ka ng PM na “ano ba talaga ang sinasaklaw ng login test?”, TypeScript file ang maituturo mo.
Sa Cucumber, maisusulat mo ang parehong test sa Gherkin:
Feature: User Authentication

  Scenario: Successful login
    Given the app is launched
    And I am on the "Login" screen
    When I type "user@example.com" into the input with testID "email-input"
    And I type "password123" into the input with testID "password-input"
    And I tap the "Login" button
    Then I should see the "Home" screen
Parehong Detox commands sa ilalim. Kahit sino sa team ay makakabasa na ngayon ng test, makakapag-review, at makakapag-suggest ng mga scenario na napalampas mo. Kapag may bumagsak, nasa plain language ang sirang linya, hindi sa TypeScript.
Mga assumption
Isinulat ang walkthrough na ito para sa:
- React Native 0.74+ (bare workflow, hindi Expo)
- TypeScript na may standard na RN Babel config
- macOS host (iOS simulator at Android emulator)
- Xcode 16+ na may Command Line Tools, kasama ang isang iOS simulator na nagawa na (halimbawa iPhone 16)
- Android Studio na may kahit isang AVD na nagawa na (halimbawa Pixel 7 API 35)
- Node 18 o mas bago
Binuo ko ito sa Detox 20, @cucumber/cucumber 12, ts-node, at isang kamakailang bersyon ng React Native. Ang mga bahaging malamang na mag-drift ay ang Detox init signature at ang Cucumber config keys, kaya nilagyan ko pareho ng note inline.
Kung nasa Expo ka, kailangan ng Detox ng custom dev client. Pareho lang ang Cucumber layer sa dalawang kaso.
Step 1. I-install ang Detox at Cucumber
Detox, Cucumber, at ang TypeScript loader bilang dev dependencies:
yarn add -D detox@20.51.3 @cucumber/cucumber@12.9.0 ts-node@10.9.2 tsconfig-paths@4.2.0
cd ios && pod install && cd ..
Sa mga naka-pin na bersyong ito na-validate ang walkthrough, sa blog-2026-08 tag ng repo.
Kailangan ang iOS pod install dahil may dalang native code ang Detox na kailangang i-link sa test build.
Kailangan mo rin ng dalawang host-level tool na hindi npm packages:
brew tap wix/brew
brew install applesimutils
Ang applesimutils ang ginagamit ng Detox para patakbuhin ang iOS simulator. Para sa Android, kailangan mo ng gumaganang emulator. Tinatawag ang Detox CLI gamit ang npx detox, kaya hindi kailangan ng global install.
Step 2. Ang tatlong config files
Tatlong file ang nag-uugnay sa lahat: .detoxrc.js (o detox.config.js. Tinatanggap ng Detox ang dalawa), cucumber.js, at isang slim na tsconfig.cucumber.json. Dapat pangalanang cucumber.js (o .cjs/.mjs/.json) ang Cucumber config: iyon ang filename na nilo-load ng cucumber-js by default, at walang nagpapasa ng explicit na --config sa setup na ito.
.detoxrc.js
Ang Detox configuration ang nagde-define ng app builds at device targets:
Isang bagay na HINDI ginagawa ng .detoxrc.js dito: ang pag-connect ng Detox sa Cucumber. Kapag Cucumber ang runner, direktang tinatawag mo ang cucumber-js at hindi kailanman kino-consult ang sariling testRunner config ng Detox; ang support file sa step 3 ang tanging tulay. Inilalarawan lang ng .detoxrc.js ang apps at devices:
module.exports = {
  apps: {
    'ios.debug': {
      type: 'ios.app',
      binaryPath: 'ios/build/Build/Products/Debug-iphonesimulator/YourApp.app',
      build: 'xcodebuild -workspace ios/YourApp.xcworkspace -scheme YourApp -configuration Debug -sdk iphonesimulator -derivedDataPath ios/build',
    },
    'android.debug': {
      type: 'android.apk',
      binaryPath: 'android/app/build/outputs/apk/debug/app-debug.apk',
      build: 'cd android && ./gradlew assembleDebug assembleAndroidTest -DtestBuildType=debug',
    },
  },
  devices: {
    simulator: {
      type: 'ios.simulator',
      device: { type: 'iPhone 16' },
    },
    emulator: {
      type: 'android.emulator',
      device: { avdName: 'Pixel_7_API_35' },
    },
  },
  configurations: {
    'ios.sim.debug': {
      device: 'simulator',
      app: 'ios.debug',
    },
    'android.emu.debug': {
      device: 'emulator',
      app: 'android.debug',
    },
  },
};
cucumber.js
Ang Cucumber configuration ang nagsasabi kung saan hahanapin ang feature files, step definitions, at kung paano i-format ang output:
// Ilang worker ang makukuha ng run na ito: pini-pin ito ng DETOX_PARALLEL=false
// sa isa, ino-override ito ng DETOX_WORKERS, at kung wala, dalawang iOS
// simulator pero iisang Android emulator (iisa lang ang AVD sa .detoxrc.js).
const byPlatform = (process.env.DETOX_CONFIGURATION ?? '').includes('android') ? 1 : 2;
const workers =
  process.env.DETOX_PARALLEL === 'false' ? 1 : Number(process.env.DETOX_WORKERS ?? byPlatform);

module.exports = {
  default: {
    // Kino-compile ng ts-node ang TS/TSX na support code; nire-resolve ng
    // tsconfig-paths ang mga @app/* alias. Kailangang requireModule entries
    // sila, hindi register() calls sa itaas ng file na ito: nire-require ulit
    // ng mga parallel worker ang support code pero hindi kailanman nilo-load
    // ang config file mismo.
    requireModule: ['ts-node/register', 'tsconfig-paths/register'],
    paths: ['src/features/**/__tests__/*.feature'],
    require: [
      'src/test-utils/cucumber/support/**/*.ts',
      'src/test-utils/cucumber/step-definitions/**/*.{ts,tsx}',
      'src/**/__tests__/**/*.cucumber.{ts,tsx}',
    ],
    format: ['./src/test-utils/cucumber/formatters/CheckmarkFormatter.js'],
    strict: true,
    parallel: workers,
    retry: workers > 1 ? 1 : 0,
    failFast: workers === 1,
  },
};
Mas mahalaga ang mga requireModule entry kaysa sa hitsura nila. Ang pag-register ng ts-node gamit ang require() sa itaas ng file na ito ay gumagana hanggang sa unang parallel run: nire-require ulit ng bawat worker ang support code pero hindi kailanman nilo-load ang config file, kaya kailangang dumaan ang registration sa requireModule, na nire-replay ng Cucumber sa loob ng bawat worker. Ang sariling options ng ts-node (transpile-only, JSX) ay nasa ts-node block ng tsconfig.cucumber.json.
| Option | Ano ang ginagawa |
|---|---|
requireModule | Mga module na nilo-load bago ang support code, sa bawat worker: ts-node at tsconfig-paths |
paths | Kung saan nakalagay ang mga Gherkin feature file |
require | Kung saan nakalagay ang step definitions at support files |
format | Custom formatter para sa readable output |
strict | Nagfa-fail kapag may undefined o pending steps |
parallel | Bilang ng workers, mula sa env-driven na workers sa itaas |
retry | Isang retry para sa flaky tests, sa parallel runs lang |
failFast | Huminto sa unang failure, sa sequential runs lang |
tsconfig.cucumber.json
Isang slim na TypeScript config para sa Cucumber runtime, hiwalay sa pangunahing app tsconfig:
{
  "compilerOptions": {
    "module": "commonjs",
    "target": "ES2020",
    "lib": ["ES2020"],
    "moduleResolution": "node",
    "jsx": "react",
    "esModuleInterop": true,
    "skipLibCheck": true,
    "isolatedModules": true,
    "strict": false,
    "baseUrl": ".",
    "rootDir": ".",
    "ignoreDeprecations": "6.0",
    "paths": { "@app/*": ["src/*"] },
    "types": ["node", "detox"]
  },
  "ts-node": {
    "transpileOnly": true,
    "compilerOptions": { "module": "commonjs", "jsx": "react" }
  },
  "include": ["src/**/*.ts", "src/**/*.tsx"]
}
Tatlong bagay na dapat tandaan. Ang "types": ["node", "detox"] ang nagtuturo sa TypeScript na ang device, element, by, at waitFor ay global. Kung wala ito, magiging pula ang bawat step definition sa device.launchApp. Ang "strict": false ay isang praktikal na desisyon para sa test files, kung saan mangangailangan ng paulit-ulit na guards ang optional chains sa scenario results. At ang ignoreDeprecations at ang explicit na rootDir ang nagpapanatiling kayang i-parse ng TypeScript 6 ang config, dahil dine-deprecate nito ang baseUrl at ang node-style resolution; sa TypeScript 5, tanggalin ang ignoreDeprecations na linya, dahil "5.0" lang ang tinatanggap ng 5.x.
Ituro ang cucumber-js sa config na ito sa pamamagitan ng TS_NODE_PROJECT=tsconfig.cucumber.json sa npm script.
Step 3. Ang support layer
Tatlong file ang nagse-set up ng Detox lifecycle sa loob ng Cucumber: detox-setup.ts, hooks.ts, at world.ts.
detox-setup.ts
Inilalantad ng Detox 20 ang programmatic lifecycle nito sa pamamagitan ng detox/internals entry point. Ang public 'detox' import ang nagbibigay sa’yo ng device, element, by, waitFor. Ang lifecycle hooks (init, cleanup, onTestStart, onTestDone) ay nasa ilalim ng 'detox/internals':
import detox from 'detox/internals';

export const setupDetox = async (workerId: string = '0') => {
  const config = process.env.DETOX_CONFIGURATION;
  if (!config) {
    throw new Error('DETOX_CONFIGURATION is not set (e.g. ios.sim.debug)');
  }
  await detox.init({ workerId: `cucumber-worker-${workerId}` });
};

export const cleanupDetox = async () => {
  await detox.cleanup();
};

export { detox };
hooks.ts
Ito ang nag-uugnay sa lifecycle ng Cucumber at sa device management ng Detox:
import { After, AfterAll, Before, BeforeAll, Status } from '@cucumber/cucumber';
import { execSync } from 'child_process';
import { device } from 'detox';

import { cleanupDetox, detox, setupDetox } from './detox-setup';
import { DetoxWorld } from './world';

// Sa mga iOS 17+ simulator, lumalabas ang system sheet na "Save Password?"
// pagkatapos i-submit ang kahit anong password form. Hindi maaabot ng Detox
// ang mga system sheet, kaya nagta-timeout ang bawat paghihintay pagkatapos
// ng login sa likod nito. Isinusulat nito ang parehong preference na
// isinusulat ng toggle sa Settings (General > AutoFill & Passwords) bago
// ang unang scenario.
const disablePasswordAutofill = (): void => {
  if (device.getPlatform() !== 'ios') return;
  try {
    execSync(
      `xcrun simctl spawn ${device.id} defaults write com.apple.WebUI AutoFillPasswords -bool false`,
      { stdio: 'ignore' }
    );
  } catch {
    console.warn('Could not disable simulator password autofill');
  }
};

BeforeAll({ timeout: 180 * 1000 }, async function () {
  const workerId = process.env.CUCUMBER_WORKER_ID ?? '0';
  await setupDetox(workerId);
  disablePasswordAutofill();
  await device.launchApp({
    newInstance: true,
    launchArgs: { detoxEnableSynchronization: 0 },
  });
  await device.enableSynchronization();
});

Before({ timeout: 30000 }, async function (this: DetoxWorld, { pickle }) {
  await detox.onTestStart({
    title: pickle.name,
    fullName: pickle.name,
    status: 'running',
  });
  await device.disableSynchronization();
  await device.reloadReactNative();
  await new Promise(resolve => setTimeout(resolve, 500));
  await device.enableSynchronization();
});

After(async function (this: DetoxWorld, { pickle, result }) {
  const testStatus = result?.status === Status.PASSED ? 'passed' : 'failed';
  if (result?.status === Status.FAILED) {
    try {
      await device.takeScreenshot(pickle.name);
    } catch (error) {
      console.error('Failed to take screenshot:', error);
    }
  }
  await detox.onTestDone({
    title: pickle.name,
    fullName: pickle.name,
    status: testStatus,
  });
});

AfterAll(async function () {
  await cleanupDetox();
});| Hook | Timeout | Ano ang ginagawa |
|---|---|---|
BeforeAll | 180s | Nagbu-boot ng simulator, nagdi-disable ng password autofill, nagla-launch ng app |
Before | 30s | Nagre-reload ng React Native para sa bagong state bawat scenario |
After | default | Kumukuha ng screenshot kapag bumagsak, nagno-notify sa Detox |
AfterAll | default | Nililinis ang Detox |
Mahalaga ang synchronisation sequence. Mag-launch na naka-disable ang synchronisation (detoxEnableSynchronization: 0), tapos i-enable muli pagkatapos tumakbo ang app. Iniiwasan nito ang Detox timeout na nararanasan mo kapag mabagal ang initial bundle load. Ganoon din ang trato sa per-scenario reload: i-suspend ang synchronisation, mag-reload, bigyan ng sandali ang bundle, i-enable muli. Puwedeng kumapit ang idle tracking ng Detox sa isang timer na ginawa habang nag-e-evaluate ang bundle at maghintay dito hanggang mag-timeout ang step, habang nakatengga lang ang app sa unang screen nito.
Sulit ang autofill helper sa sandaling mag-submit ng password ang isang scenario. Kung wala ito, nag-aalok ang simulator na i-save ang credential sa isang system sheet na nakapatong sa app mo, at papalpak ang susunod na visibility wait na may timeout na nakaturo sa isang screen na walang problema.
world.ts
Isang custom Cucumber World na nagpapasa ng Detox context sa pagitan ng mga step:
import { IWorldOptions, setDefaultTimeout, setWorldConstructor, World } from '@cucumber/cucumber';
import { device } from 'detox';

// Naghihintay ang mga step definition nang hanggang 20s sa pamamagitan ng
// Detox (waitFor().withTimeout), pero pinapatay ng Cucumber ang kahit anong
// step na lumagpas sa 5s by default. Itaas ang limitasyon nang mas
// mataas sa pinakamahabang paghihintay na balak mong hilingin sa Detox.
setDefaultTimeout(60 * 1000);

export class DetoxWorld extends World {
  device: typeof device;
  testID: string | null;

  constructor(options: IWorldOptions) {
    super(options);
    this.device = device;
    this.testID = null;
  }

  setTestID(id: string) { this.testID = id; }
  getTestID(): string {
    if (!this.testID) throw new Error('No testID set');
    return this.testID;
  }
}

setWorldConstructor(DetoxWorld);
Ang pagtawag sa setWorldConstructor ang nagkokonekta ng class na ito sa bawat this sa loob ng isang step. Kalimutan mo ang tawag na ‘yon at magiging undefined ang this.device. Kasinghalaga ang tawag sa setDefaultTimeout: mas mababa ang 5-segundong default ng Cucumber kaysa sa 20-segundong paghihintay na hinihiling ng mga step definition sa Detox, kaya kung wala ito, namamatay ang pinakamahahaba mong paghihintay bilang step timeout bago pa matapos maghintay ang Detox.
Step 4. Pagsusulat ng unang feature file mo
Plain text na may Gherkin syntax ang feature files. Naglalarawan ang bawat scenario ng isang user flow. Maglagay ng isang file sa src/features/Auth/__tests__/Login.feature:
Feature: User Authentication

  Scenario: Successful login
    Given the app is launched
    And I am on the "Login" screen
    When I type "testuser@example.com" into the input with testID "email-input"
    And I type "SecurePass123" into the input with testID "password-input"
    And I tap the "Login" button
    Then I should see the "Home" screen

  Scenario: Login with invalid credentials
    Given the app is launched
    And I am on the "Login" screen
    When I type "testuser@example.com" into the input with testID "email-input"
    And I type "WrongPassword" into the input with testID "password-input"
    And I tap the "Login" button
    Then I should see text "Invalid email or password"

  Scenario: Deep link opens password reset
    Given the app is launched via password reset deep link
    Then I should see the "Reset Password" screen
Sa tags, mafi-filter mo kung aling mga scenario ang tatakbo:
@accessibility @voiceover @ios
Feature: VoiceOver Gestures

  @eaa
  Scenario: Navigate login form with swipe gestures
    ...
Tapos sa test command (nasa e2e/ ang mga accessibility feature, sa labas ng default paths ng config, kaya pangalanan sila):
yarn detox:ios:test 'e2e/**/*.feature' --tags "@accessibility and @ios"Step 5. Pagsusulat ng step definitions
Bawat Gherkin step ay naka-map sa isang function. Ang step definitions ang ginagamit mong muli sa bawat feature file.
Available dito ang device, element, by at waitFor dahil dineklara na sila ng tsconfig.cucumber.json noong step 2.
Mga karaniwang steps
import { Given, When, Then } from '@cucumber/cucumber';

Given('the app is launched', async function () {
  await device.terminateApp();
  await device.clearKeychain(); // iOS only: silent no-op sa Android
  await device.launchApp({ newInstance: true });
  await new Promise(r => setTimeout(r, 500));
});

Given('I am on the {string} screen', async function (screen: string) {
  const testID = `${screen.toLowerCase().replace(/\s+/g, '-')}-screen`;
  await waitFor(element(by.id(testID)))
    .toBeVisible()
    .withTimeout(20000);
});

When('I tap the {string} button', async function (name: string) {
  const testID = `${name.toLowerCase().replace(/\s+/g, '-')}-button`;
  await element(by.id(testID)).tap();
});

When('I type {string} into the input with testID {string}',
  async function (text: string, testID: string) {
    await waitFor(element(by.id(testID)))
      .toBeVisible()
      .withTimeout(5000);
    await element(by.id(testID)).replaceText(text);
  }
);

Then('I should see the {string} screen', async function (screen: string) {
  const testID = `${screen.toLowerCase().replace(/\s+/g, '-')}-screen`;
  await new Promise(r => setTimeout(r, 500));
  await waitFor(element(by.id(testID)))
    .toBeVisible()
    .withTimeout(20000);
});

Then('I should see text {string}', async function (text: string) {
  await waitFor(element(by.text(text)))
    .toBeVisible()
    .withTimeout(5000);
});
Tatlong pattern na dapat tandaan dito. Una, isang consistent na testID convention: ang screen names ay nagiging kebab-case na may -screen o -button suffix. Ang “Login” ay tumutugma sa login-screen, ang “Home” sa home-screen, ang “Submit” sa submit-button. Pangalawa, dumadaan sa waitFor na may timeout ang bawat assertion, hindi ang hubad na expect. Kailangan ng settling time ng mga animations at network calls at hindi ito ibinibigay ng expect. Pangatlo, replaceText kaysa typeText. Nag-a-append ang typeText sa kung anuman ang nandoon na. Nagki-clear muna ang replaceText. Para sa form inputs, gusto mo ang pangalawa.
I-save ang file bilang src/test-utils/cucumber/step-definitions/common.cucumber.tsx at kukunin ito ng Cucumber sa pamamagitan ng glob sa cucumber.js mo.
Mga strategy sa paghahanap ng elements
Minsan hindi sapat ang by.id(). Para hindi masira sa pagitan ng iOS at Android, sumusubok ng maraming strategy ang isang step definition:
When('I tap the text {string}', async function (text: string) {
  try {
    await element(by.text(text)).tap();
  } catch {
    try {
      await element(by.label(text)).tap();
    } catch {
      const testID = text.toLowerCase().replace(/\s+/g, '-');
      await element(by.id(testID)).tap();
    }
  }
});
Subukan muna ang by.text() (nakikitang text), tapos by.label() (accessibility label) bilang fallback, tapos by.id() (testID). Hina-handle nito ang mga buttons na magkaiba ang pag-render ng text sa iba’t ibang platform.
Ano ang kausap ng app habang tumatakbo ang mga test na ito
Ang mga login scenario ay nagta-type ng credentials at umaasang lalabas ang Home screen, at dito lumalabas ang tanong na kailangang sagutin ng bawat E2E setup: anong backend ang tinatamaan ng app? Patakbuhin ito sa totoong backend at babagsak ang suite mo tuwing nagkaka-hiccup ang staging. Ang deterministic na sagot ay ang pag-mock sa bundle level gamit ang isang E2E build flag, na may sarili nitong post: Metro runtime mocking para sa deterministic React Native E2E tests. Hangga’t wala ka pang layer na iyon, ituro ang E2E build sa isang stable na test environment at ituring ang network flakes bilang suite failures, hindi test failures.
Isang custom formatter
Maingay ang default output ng Cucumber. Nagbibigay ang custom formatter ng malinis na results na mas madaling basahin sa CI logs:
✓ Feature: User Authentication
  ✓ Scenario: Successful login (2340ms)
    ✓ Given the app is launched (890ms)
    ✓ And I am on the "Login" screen (450ms)
    ✓ When I type "testuser@example.com" into the input with testID "email-input" (120ms)
    ✓ And I type "SecurePass123" into the input with testID "password-input" (95ms)
    ✓ And I tap the "Login" button (85ms)
    ✓ Then I should see the "Home" screen (700ms)

  ✗ Scenario: Login with expired token (1890ms)
    ✓ Given the app is launched (850ms)
    ✓ And I am on the "Login" screen (420ms)
    ✗ Then I should see the "Session Expired" screen (620ms)
      Error: Element not found: session-expired-screen

2 scenarios (1 passed, 1 failed)
12 steps (11 passed, 1 failed)
Ang formatter ay isang class na nagsu-subscribe sa envelope events ng Cucumber (testStepFinished, testCaseFinished), nagma-map ng status ng bawat step sa isang icon at kulay, at nagpi-print ng linya. Ang sa akin, nagta-track din ng pickles, nagma-map ng test steps pabalik sa Gherkin text ng mga ito, nagti-time ng bawat step, at nagpi-print ng summary na may bilang ng pumasa at bumagsak, kaya umaabot ito sa mga 250 linya. Ito ang gumagawa ng sample output sa simula ng section na ito; ang file ay src/test-utils/cucumber/formatters/CheckmarkFormatter.js sa repo na naka-link sa dulo.
Parallel execution
Kayang patakbuhin ng Detox ang scenarios sa maraming simulators. Ang parallel setting ng Cucumber ang nagtatakda ng bilang ng workers, at may sariling Detox instance ang bawat worker.
# Patakbuhin gamit ang 3 parallel simulators
DETOX_WORKERS=3 yarn detox:ios:test:parallel
Binabasa ng BeforeAll hook ang CUCUMBER_WORKER_ID at ipinapasa ito sa setupDetox para mag-initialise ang bawat worker sa sarili nitong simulator. Ang Cucumber na ang bahala sa pag-distribute ng scenarios sa mga worker.
| Setting | Local | CI |
|---|---|---|
| iOS workers | 2-3 | 3 |
| Android workers | 1-2 | 2 |
| Retry kapag bumagsak | 1 | 1 |
| Fail fast | Hindi | Hindi |
Isang tip sa parallel runs. Panatilihing naka-off ang fail-fast kapag tumatakbo nang parallel. Hindi dapat patayin ng isang flaky scenario ang ibang workers, at kapag naka-enable ang retry, may pangalawang pagkakataon ang flake habang nagpapatuloy ang iba. Sa single-worker run, OK lang naka-on ang fail-fast.
Accessibility testing gamit ang BDD
Hindi direktang nagda-drive ang Detox ng VoiceOver o TalkBack. Kailangan pa rin ang manual screen reader testing. Ang kaya naman ng Detox ay i-check kung tama ang mga accessibility labels, roles, at traits sa bawat element. Bilang Gherkin scenarios, nahuhuli ng mga check na ito ang isang uri ng regression na walang makakapansin nang manu-mano hanggang sa buksan ng isang user na may VoiceOver ang app.
May dalawang feature file ang repo ko para dito, isa para sa iOS patterns at isa para sa Android.
@accessibility @voiceover @ios @eaa
Feature: VoiceOver Gestures

  Scenario: Navigate login form with swipe right
    Given the app is launched
    And I am on the "Login" screen
    And VoiceOver focus is on the "Email" element
    When I swipe right to move to the next element
    Then VoiceOver focus should move to the next element
    And I should hear the accessibility label for "Password"

  Scenario: Activate login button with double tap
    Given the app is launched
    And I am on the "Login" screen
    And I have entered valid credentials
    And VoiceOver focus is on the "Login" button
    When I double tap to activate
    Then I should see the "Home" screen

  Scenario: Error announced via live region
    Given the app is launched
    And I am on the "Login" screen
    And I have entered invalid credentials
    When I double tap to activate
    Then the error message should be announced via a live region
Nagpapanatili ng state ang step definitions para sa accessibility testing:
interface AccessibilityState {
  focusedElementIndex: number;
  visitedElements: string[];
  lastAnnouncement: string | null;
  granularity: 'characters' | 'words' | 'lines' | 'headings' | 'default';
}
Tina-track nito ang expected focus order, announcement text, at reading granularity. Mga 50 scenarios sa dalawang feature file ang sumasaklaw sa labels, focus behaviour, live region announcements, at custom actions. Pinipigilan nitong ma-ship ang mga halatang regression.
Patakbuhin ito
Ganito ang mga script na ginagamit ko sa package.json:
{
  "scripts": {
    "detox:ios:build": "ENVFILE=.env.e2e node scripts/timed-run.js detox build -c ios.sim.debug",
    "detox:ios:mock-validation": "DETOX_PARALLEL=false DETOX_LOGLEVEL=error DETOX_CONFIGURATION=ios.sim.debug TS_NODE_PROJECT=tsconfig.cucumber.json cucumber-js --tags @mock-validation",
    "detox:ios:test": "DETOX_PARALLEL=false DETOX_LOGLEVEL=error DETOX_CONFIGURATION=ios.sim.debug TS_NODE_PROJECT=tsconfig.cucumber.json cucumber-js --tags 'not @mock-validation'",
    "detox:ios:test:parallel": "DETOX_LOGLEVEL=error DETOX_CONFIGURATION=ios.sim.debug TS_NODE_PROJECT=tsconfig.cucumber.json cucumber-js --tags 'not @mock-validation'",
    "e2e:ios": "yarn detox:ios:build && yarn detox:ios:mock-validation && yarn detox:ios:test"
  }
}
Pansinin na direktang nagpapatakbo ng cucumber-js ang mga test script sa halip na detox test. Sa Cucumber bilang runner, hindi ka dumadaan sa runner wrapper ng Detox. Nag-i-initialise ang Detox mula sa support file mo. Galing sa cucumber.js ang lahat ng iba pa: idinadagdag lang ng mga script ang environment at isang tag filter. Ang timed-run.js ay maliit na wrapper na nagpi-print kung gaano katagal ang build, at ang DETOX_PARALLEL=false ang nagpi-pin ng isang run sa isang worker sa pamamagitan ng workers expression sa config (hindi ito sine-set ng parallel na variant, kaya DETOX_WORKERS ang nagpapasya; ang bersyon sa repo ay nagbu-boot pa muna ng mga simulator). Mahalaga ang prefix na ENVFILE=.env.e2e: ibine-bake ng react-native-config ang mga env value sa native binary sa build time, at ang mga E2E flag (mocked APIs, test-only screens) ay nasa isang committed na .env.e2e na puno ng placeholder values. Kapag nag-build ka nang wala ito, mako-compile ang app gamit ang development env mo, hindi kailanman mapapasama ang mga test-only screen sa binary, at papalpak ang mock-validation stage bago pa magsimula ang buong suite.
May gitnang stage ang e2e:ios chain na sulit kopyahin. Isang two-scenario smoke pass na naka-tag na @mock-validation ang nagpapatunay na nag-boot ang app sa mocked backend nito bago sayangin ng buong suite ang buong run para malaman ‘yon sa tig-iisang timeout. Ang sa akin, nagche-check na talagang hinaharang ng Metro runtime mocking layer ang mga request.
Unang run:
yarn e2e:ios⏱️ Starting: detox build -c ios.sim.debug
Building app for ios.sim.debug...
xcodebuild ... ** BUILD SUCCEEDED **
$ cucumber-js
✓ Feature: User Authentication
✓ Scenario: Successful login (2340ms)
✓ Scenario: Login with invalid credentials (1820ms)
2 scenarios (2 passed)
12 steps (12 passed)Kung mag-fail ang xcodebuild sa unang run, i-check na talagang nandiyan ang simulator na nakapangalan sa .detoxrc.js (xcrun simctl list devices). Ang pinakakaraniwang first-run failure ay isang hardcoded na iPhone 16 na hindi mo kailanman ginawa sa Xcode.
Mga karaniwang pagkakamali
Ang synchronisation ang pinakamahirap na bahagi. Sinusubukan ng Detox na maghintay nang awtomatiko hanggang idle ang app, pero nakakalito ang mga animations, timers, at network calls. Ang launch-with-sync-disabled pattern (detoxEnableSynchronization: 0 tapos enableSynchronization() pagkatapos) ang umiiwas sa pinakakaraniwang timeout.
Nag-a-append ang typeText, nagpapalit ang replaceText. Kung may placeholder text o dating input ang isang field, dinadagdagan ito ng typeText. Gamitin ang replaceText para sa form inputs kung saan gusto mo ng malinis na value.
Screenshots kapag bumagsak. Kumukuha ng screenshot ang After hook kapag bumagsak ang isang scenario. Kung wala ito, pagbabasa ng logs at panghuhula ang pag-debug ng CI failures. Ipangalan ang screenshot sa scenario para maitugma mo ang isang failure sa larawan nito.
Ilarawan ang behaviour, hindi ang implementation. Isulat na “When I log in”, hindi “When I type into email-input and tap login-button”. Ang mga detalye ng implementation ay nasa step definitions, hindi sa Gherkin. Kung hindi kayang basahin ng isang non-engineer ang feature file nang malakas at maintindihan ito, na-leak mo ang detalye sa maling layer.
Ang buong file structure
src/
  test-utils/
    cucumber/
      formatters/
        CheckmarkFormatter.js    # Custom na ✓/✗ formatter
      step-definitions/
        common.cucumber.tsx      # Mga shared steps (tap, type, navigate)
        auth.cucumber.tsx         # Mga authentication steps
        accessibility.cucumber.tsx # Mga VoiceOver + TalkBack steps
      support/
        detox-setup.ts           # Detox initialisation
        hooks.ts                  # BeforeAll/Before/After/AfterAll
        world.ts                  # Cucumber World context
e2e/
  accessibility/
    VoiceOverGestures.feature    # Mga iOS screen reader tests
    TalkBackGestures.feature     # Mga Android screen reader tests
Ano ang nakukuha mo
Isang umaga ang setup. Isang hapon ang unang feature file. Pagkatapos niyan, mabilis na ang pagdagdag ng scenarios dahil reusable ang step definitions sa lahat ng features.
Ang nabuo mo sa dulo:
- Tests na mababasa ng kahit sino sa team. Product, QA, designers. Ang Gherkin file ang spec at test nang sabay, at kapag nag-fail ang isang scenario, pinapangalanan ng report ang step na nasira sa halip na isang linya ng test code.
- Parallel execution na gumagana sa Detox. Tatlong simulators, tatlong workers, at mas maikling CI run.
- Accessibility regression coverage para sa labels, roles, at traits, katabi ng manual screen reader pass, hindi kapalit nito.
Sinasaklaw ng post na ito ang E2E testing. Para sa unit at integration tests, gumagamit ako ng MSW v2 para i-mock ang network layer sa halip na jest.fn(). Magkasundo ang dalawa: MSW para sa mabilis at focused na tests sa tunay na HTTP calls; Detox + Cucumber para sa buong user flows sa tunay na device.
Ang code sa post na ito ay mula sa rn-warrendeleon, ang personal kong React Native project; ang blog-2026-08 tag ang nagmamarka ng eksaktong estadong tinutugma nito. Nasa repo ang kumpletong Detox + Cucumber setup, ang step definitions, ang custom formatter, at ang accessibility feature files.